# Tutorial
In this tutorial, we are going to build a straightforward clone of the game 'PONG' using Minotaur.
You can play the final product HERE
# A basic outline of what we're going to cover.
- Project setup.
- Drawing shapes with the Canvas API.
- Animating those shapes.
- Accepting user input.
- Object collision.
- Game states.
# Project setup
Minotaur was built to be used alongside modern JavaScript build-tools. You can get as far into setting up your environment as you want, but for this tutorial, we're going to keep things pretty basic.
We'll be using webpack to build our project and "http-server" to serve it so we can view it in the browser. If you know what you're doing, feel free to use any other combination of bundler and server.
# Installations
Create a folder for the project, and inside it run the following command to install the dependencies we'll need to build our game.
npm install @codyloyd/minotaur-base

npm install --save-dev webpack webpack-cli

npm install -g simple-http-server
Run the following commands to create the files we'll be using.
touch index.html

mkdir src
touch src/index.js
Add the following basic boilerplate to your index.html:
<!-- index.html -->
<!DOCTYPE html>
<html lang="en">
<head>
  <title>TinyGame!</title>
</head>
<body>
  <style>
    body {
      background: blue;
    }
    canvas {
      border: 4px solid black ;
      background: white;
    }
  </style>
  <div id="game"></div>
  <script src="dist/main.js"></script>
</body>
</html>
Feel free to set up your HTML and CSS however you like. The critical item here is the <div id="game"> which TinyGame uses to set up the game canvas.
In src/index.js, add the following code to import and initialize a new Game object.
// src/index.js
import {Game} from '@minotaur/base'

const game = new Game({
  width: 400,
  height: 400,
  parent: 'game'
})

game.update = function(dt) {
}

game.draw = function() {
}

game.start()
At this point, if you build the code with webpack, you should be able to run it in your browser, and see a blank canvas! Run the following in the project folder:
npx webpack --mode=development --watch
in another terminal run
http-server
Watch the output as the server command runs and look for a URL. The default at the time of this writing is http://localhost:8080, but depending on the specifics of your system, it might be slightly different. Whatever the URL is, open it in your browser. You should see this:
# Drawing shapes
To draw shapes to our canvas, we are going to reference the native HTML Canvas API.
- Here is an introduction to Canvas if you've never seen it
- This page is probably the most useful documentation page.
You don't need to know everything about Canvas to get started here. The general overview provided by the links above should be good enough for now.
Instead of re-implementing all of these canvas drawing functions, Minotaur exposes the rendering context of the game canvas that new Game() creates. Therefore, to draw shapes, all you need to do is reference that context and use the built-in methods!
In your src/index.js file, add a fillRect function to your game.draw() function like this:
game.draw() {
  game.context.fillRect(20,20,100,100)
}
When you refresh your browser, you should now see a 100px wide black square in the upper corner of your Canvas!
Most Canvas drawing functions, and therefore most Minotaur functions, take a similar set of arguments. In this case, the arguments are, in order:
x: the x coordinates of the top-left corner of our shapey: the y coordinates of the top-left corner of our shapewidth: the width of our shapeheight: the height of our shape
Which means, we've drawn a rectangle that starts at x:20, y:20 and is 100px/100px.
# Game Objects
For our PONG clone, we're going to need three shapes:
- Two rectangle paddles
- a ball.
To keep our code organized and to make moving these shapes around easier later, we're going to store them in JavaScript objects.
Add these objects to your src/index.js and then draw them inside your game.draw() function:
const ball = {
  x: 200,
  y: 200,
  radius: 15
}

const leftPaddle = {
  x: 10,
  y: 10,
  w: 10,
  h: 100
}

const rightPaddle = {
  x: game.width - 20,
  y: 10,
  w: 10,
  h: 100
}

game.draw = function() {
  game.context.fillRect(leftPaddle.x, leftPaddle.y, leftPaddle.w, leftPaddle.h)
  game.context.fillRect(rightPaddle.x, rightPaddle.y, rightPaddle.w, rightPaddle.h)

  // this is the code for drawing a circle for our ball.
  game.context.beginPath()
  game.context.arc(ball.x, ball.y, ball.radius, 0, Math.PI * 2)
  game.context.fill()
}
The code for drawing a circle is a little tedious, so if it's something that you're going to be doing a lot you may want to abstract it out to it's own function like so:
function drawCircle(x,y,radius) {
  game.context.beginPath()
  game.context.arc(ball.x, ball.y, ball.radius, 0, Math.PI * 2)
  game.context.fill()
}
Since we only need to draw one ball, we don't need to worry about this for now.
# Color
Drawing in color with Canvas is easy. Before doing a drawing operation, set a fillStyle using a css-color string. For something as simple as PONG, we don't need much color, but just to keep things interesting, let's pick a couple of colors for our paddles and ball. You can use any color that would be recognized in a css file such as an rgb or hsl color. Even named colors are recognized.
Let's use a couple of hex colors for now.
game.draw = function() {
  // this fillRect covers the entire screen and is the 'background' for our game
  game.context.fillStyle = "#003049"
  game.context.fillRect(0,0,game.width, game.height)
  game.context.fillStyle = "#eae2b7"
  game.context.fillRect(leftPaddle.x, leftPaddle.y, leftPaddle.w, leftPaddle.h)
  game.context.fillRect(rightPaddle.x, rightPaddle.y, rightPaddle.w, rightPaddle.h)

  // this is the code for drawing a circle for our ball.
  game.context.fillStyle = "#fcbf49"
  game.context.beginPath()
  game.context.arc(ball.x, ball.y, ball.radius, 0, Math.PI * 2)
  game.context.fill()
}
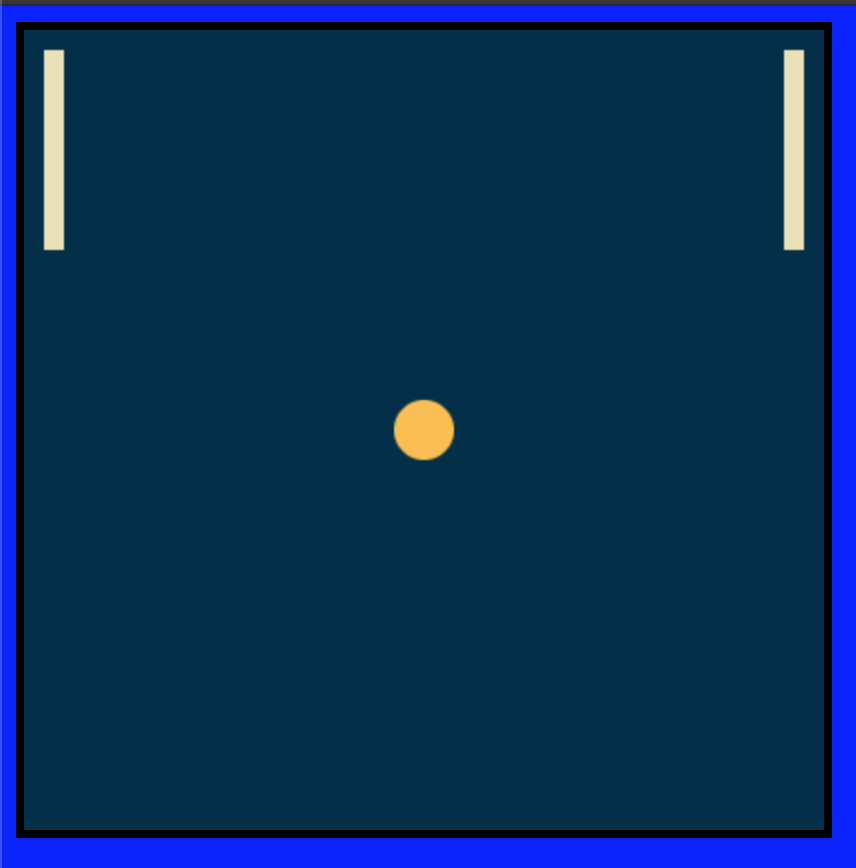
At this point, your code should look like this
And running the game gives us this:
# Animation
To set things into motion, update each game object's position variables inside of the game.update() function.
To begin with, moving the ball across the screen is as simple as doing something like this:
game.update(dt) {
  ball.x += 1
}
The above code runs every frame and increments the x position of the ball by 1px. However, the following issues arise:
- The movement speed is dependent on the game's framerate.
- The speed of the ball is constant and cannot be changed.
Updating our ball object and the game.update() function fixes both of these issues.
First, add variables to your ball object for x and y velocity. Call them vx and vy and then use those variables to control the speed of the ball:
const ball = {
  x: 200,
  y: 200,
  vx: 50,
  vy: 60,
  radius: 15
}

game.update = function(dt) {
  // update ball position
  ball.x += ball.vx * dt
  ball.y += ball.vy * dt
}
Notice that in the above snippet, we multiply the velocity by game.update's dt parameter. This parameter stands for the amount of time that has elapsed since the last time game.update has been called. Doing this calculation keeps the speed of the ball consistent, even if the framerate lags and the time between each iteration of the update function are inconsistent.
# Wall Bounce
Making the ball bounce off of the walls requires checking the position of the ball and changing its direction once it hits the edge of the game canvas. We can do this check inside of the update function like so:
game.update = function(dt) {
  // update ball position
  ball.x += ball.vx * dt
  ball.y += ball.vy * dt

  if (ball.x > game.width - ball.radius || ball.x < ball.radius) {
    ball.vx *= -1
  }
  if (ball.y > game.width - ball.radius || ball.y < ball.radius) {
    ball.vy *= -1
  }
}
With circles, the x and y coordinates refer to the center of the circle, and the radius is the distance from the center to the edge. Therefore when we do the calculation we have to take ball.radius into account.
On our game canvas, the ball is considered out of bounds if ball.x is bigger than game.width - ball.radius or if it is smaller than ball.radius.
If you run the game now, the ball should move and bounce around the screen. Feel free to update the velocity variables inside the ball object to fine-tune the speed.
# User input
Minotaur does not need to handle input for you, because JavaScript and the native DOM API are already perfectly capable of that. Handling user input is as easy as setting up event listeners.
In your index.js file, add a function to handle keypresses and then add a 'keydown' event listener that uses it.
function handleKeydown(event) {
  const key = event.key
  if (key == 'ArrowUp') {
    // move paddle up
  }
  if (key == 'ArrowDown') {
    // move paddle down
  }
}
document.addEventListener('keydown', handleKeydown)
Inside this function, we simply need to update our paddle position using the objects we've already set up. For now, we're going to keep the two paddles in sync, but you might want to either add a different set of keys for a second player or implement a little AI so you can play against the computer.
Our updated handleKeydown function:
function handleKeydown(event) {
  const key = event.key
  if (key == 'ArrowUp') {
    leftPaddle.y -= 10
    rightPaddle.y -= 10
  }
  if (key == 'ArrowDown') {
    leftPaddle.y += 10
    rightPaddle.y += 10
  }
}
The above code is functional but introduces two easily fixed problems.
- The paddles do not move smoothly when you press and hold a key down and depending on your computer's key-repeat settings, you might have to smash the arrow keys repeatedly to get the paddle to move more than 10px at a time.
- The paddles can move off the screen!
There are a few steps required to fix the first issue:
- Add a property for the paddle's velocity (
vy) to each paddle. (We don't need avxbecause the paddles can only move up and down.) - Use that property to update the position of the paddle.
- Change the paddle's velocity when a key is pressed and reset the velocity when that key is released.
# Smooth Paddle Motion
# Add velocity property to paddles:
const leftPaddle = {
  x: 10,
  y: 10,
  w: 10,
  h: 100,
  // ADD THIS!
  vy: 0
}

const rightPaddle = {
  x: game.width - 20,
  y: 10,
  w: 10,
  h: 100,
  // ADD THIS!
  vy: 0
}
# Update position of paddles in game.update
game.update = function(dt) {
  // update ball position
  ball.x += ball.vx * dt
  ball.y += ball.vy * dt

  //ADD THIS!
  // update paddle position
  leftPaddle.y += leftPaddle.vy * dt
  rightPaddle.y += rightPaddle.vy * dt

  ...
}
# Use keypresses to change paddle velocity.
Since we want to change the velocity only when a key is pressed down, we need to do a little refactoring to our handleKeydown function and add a new function for handling keyUp. There are many possible ways to solve this problem. We're going to add an object for keeping track of which keys are pressed down at any given time and then manipulate that object in our keypress-handlers.
const isDown = {
  ArrowUp: false,
  ArrowDown: false
}
function handleKeydown(event) {
  const key = event.key
  if (key == 'ArrowUp') {
    isDown.ArrowUp = true
  }
  if (key == 'ArrowDown') {
    isDown.ArrowDown = true
  }
}
function handleKeyup(event) {
  const key = event.key
  if (key == 'ArrowUp') {
    isDown.ArrowUp = false
  }
  if (key == 'ArrowDown') {
    isDown.ArrowDown = false
  }
}
document.addEventListener('keydown', handleKeydown)
document.addEventListener('keyup', handleKeyup)
Then, we can use the isDown object to update our paddle velocity inside the game.update function. To make sure the velocity is always reset to 0 when keys are released, we're going to always set it to 0, and then check for isDown on our keys to override that.
game.update = function(dt) {
  // update ball position
  ball.x += ball.vx * dt
  ball.y += ball.vy * dt

  // update paddle velocity
  leftPaddle.vy = 0
  rightPaddle.vy = 0
  if (isDown.ArrowDown) {
    leftPaddle.vy = 180
    rightPaddle.vy = 180
  }
  if (isDown.ArrowUp) {
    leftPaddle.vy = -180
    rightPaddle.vy = -180
  }

  // update paddle position
  leftPaddle.y += leftPaddle.vy * dt
  rightPaddle.y += rightPaddle.vy * dt
# Keep the paddles on the screen
Keeping the paddles from going off the edge of the screen can be handled in basically the same way as our ball collision. We're just going to set the velocity of the paddles to 0 when they hit the border. We're also going to reset the paddle's position to the actual limit so that the paddle doesn't get 'stuck' in the wall.
This adds quite a bit of code, so here is the entire game.update function
game.update = function(dt) {
  // update ball position
  ball.x += ball.vx * dt
  ball.y += ball.vy * dt

  if (ball.x > game.width - ball.radius || ball.x < ball.radius) {
    ball.vx *= -1
  }
  if (ball.y > game.width - ball.radius || ball.y < ball.radius) {
    ball.vy *= -1
  }

  // update paddle velocity
  leftPaddle.vy = 0
  rightPaddle.vy = 0
  if (isDown.ArrowDown) {
    leftPaddle.vy = 180
    rightPaddle.vy = 180
  }
  if (isDown.ArrowUp) {
    leftPaddle.vy = -180
    rightPaddle.vy = -180
  }

  if (leftPaddle.y < 0) {
    leftPaddle.vy = 0
    leftPaddle.y = 0
  }
  if(leftPaddle.y > game.height - leftPaddle.h) {
    leftPaddle.vy = 0
    leftPaddle.y = game.height - leftPaddle.h
  }

  if (rightPaddle.y < 0) {
    rightPaddle.vy = 0
    rightPaddle.y = 0
  }
  if(rightPaddle.y > game.height - rightPaddle.h) {
    rightPaddle.vy = 0
    rightPaddle.y = game.height - rightPaddle.h
  }

  // update paddle position
  leftPaddle.y += leftPaddle.vy * dt
  rightPaddle.y += rightPaddle.vy * dt
}
# Some refactoring
You may have noticed that our last few updates have added quite a bit of repeated code since we have to do the same position and velocity checks for each paddle every time. Almost any other game is going to end up being much more complicated than this one, so it's a problem that's worth solving. To clean it up, we're going to abstract out our paddle code into a simple class and put all of the update code into that file. Doing so will clean up our update function considerably.
Since we're using webpack we can move the paddle logic to a new file easily. Add a new file to your project directory called paddle.js and then import it at the top of your index.js like so:
// src/index.js
import {Paddle} from './paddle'
Create a new Paddle class inside the new file and export it. This snippet is empty but has all the functions we're going to implement.
// src/paddle.js
class Paddle {
  constructor(x, y, w, h) {

  }
  update(dt) {

  }
  draw(context) {

  }
}

export {Paddle}
# The constructor function.
If we fill out our constructor function, we can begin using the class to create our objects immeditately.
// src/paddle.js
class Paddle {
  constructor(x, y, w, h) {
    this.x = x
    this.y = y
    this.w = w
    this.h = h
    this.vy = 0
  }
  ...
}
// src/index.js
// remove the original leftPaddle and rightPaddle objects,
// replace them with this:
const leftPaddle = new Paddle(10,10,10,100)
const rightPaddle = new Paddle(game.width-20,10,10,100
At this point, the game should still run as it did before, next lets move the update logic into our class. There are some global variables being accessed inside our game's update function, so to get them into the Paddle.update we are going to pass them in as arguments. The following code is essentially our original leftPaddle update code with leftPaddle renamed to this.
// src/paddle.js
class Paddle {
  ...
  update(dt, isDown, height) {
    this.vy = 0
    if (isDown.ArrowDown) {
      this.vy = 180
    }
    if (isDown.ArrowUp) {
      this.vy = -180
    }

    if (this.y < 0) {
      this.vy = 0
      this.y = 0
    }
    if(this.y > height - this.h) {
      this.vy = 0
      this.y = height - this.h
    }

    this.y += this.vy * dt
  }
}
We can now, remove all of the update code from our index update loop and replace it like so:
// src/index.js
game.update = function(dt) {
  // update ball position
  ball.x += ball.vx * dt
  ball.y += ball.vy * dt

  if (ball.x > game.width - ball.radius || ball.x < ball.radius) {
    ball.vx *= -1
  }
  if (ball.y > game.width - ball.radius || ball.y < ball.radius) {
    ball.vy *= -1
  }

  // update paddles
  leftPaddle.update(dt, isDown, game.height)
  rightPaddle.update(dt, isDown, game.height)
}
Finally, follow the same process with the 'draw' logic. Notice we're passing in the game.context so our paddles know where to draw themselves.
// src/paddle.js
class Paddle {
  draw(context) {
    context.fillStyle = "#eae2b7"
    context.fillRect(this.x, this.y, this.w, this.h)
  }
}
// src/index.js
game.draw = function() {
  // this fillRect covers the entire screen and is the 'background' for our game
  game.context.fillStyle = "#003049"
  game.context.fillRect(0,0,game.width, game.height)

  // draw paddles
  leftPaddle.draw(game.context)
  rightPaddle.draw(game.context)

  // this is the code for drawing a circle for our ball.
  game.context.fillStyle = "#fcbf49"
  game.context.beginPath()
  game.context.arc(ball.x, ball.y, ball.radius, 0, Math.PI * 2)
  game.context.fill()
}
The complete current status of index.js and paddle.js can be found in this gist
If you want, you could easily replicate this refactoring step with the ball, in a new file called ball.js. For now, since we only have one ball, we won't worry about doing that.
# Object collision
Lets get our ball bouncing off of those paddles! The algorithm for checking whether or not the ball is colliding with the paddles is below. Add it to your index.js. For more information about this very useful algorithm search "AABB collision detection".
function isBallColliding(paddle) {
  if (ball.x - ball.radius < paddle.x + paddle.w &&
    ball.x + ball.radius > paddle.x &&
    ball.y - ball.radius < paddle.y + paddle.h &&
    ball.y + ball.radius > paddle.y) {
    return true
  }
}
All we have to do now is use the isBallColliding function in our game.update like so:
game.update = function(dt) {
  ...

  if (isBallColliding(leftPaddle) || isBallColliding(rightPaddle)) {
    ball.vx *= -1
  }
}
Now, your ball should bounce off the paddles!
# Score and Game states
The game is pretty much complete now! All we need to do is add a running score, and create starting and ending screens.
# Score
As usual, there are multiple viable ways of managing each of these things. We could add the score variable to our Paddle class, or we could create a new Player class to manage things like that. To keep things simple, we're just going to store a score object in our index.js.
// src/index.js
const score = {
  player1: 0,
  player2: 0
}
Draw the score to the screen in the game.draw function. There's a little math involved in getting it lined up to the center of the screen.
game.draw = function() {
  ...
  const scoreText = `${score.player1} | ${score.player2}`
  const textWidth = game.context.measureText(scoreText).width
  game.context.fillStyle = "#eae2b7"
  game.context.font = "48px"
  game.context.fillText(scoreText,(game.width/2)-(textWidth/2),50,game.width)
}
Now, in the game.update add the logic to increment the correct player's score when the ball hits one of the sides. We'll also reset the ball position to the middle of the screen and change it's direction when it hits. Currently, we're still doing the 'wall bounce' off of those walls, but now that we have working paddles, we can remove that and replace it with our scoring code. Here is the entire game.update function.
game.update = function(dt) {
  // update ball position
  ball.x += ball.vx * dt
  ball.y += ball.vy * dt

  if (ball.y > game.width - ball.radius || ball.y < ball.radius) {
    ball.vy *= -1
  }

  // this is what we're adding!
  if (ball.x > game.width - ball.radius) {
    // increment score
    score.player2 += 1
    // reset position
    ball.x = 200
    ball.y = 200
    // change it's direction
    ball.vx *= -1
  }
  if (ball.x < ball.radius) {
    // increment score
    score.player1 += 1
    // reset position
    ball.x = 200
    ball.y = 200
    // change it's direction
    ball.vx *= -1
  }

  leftPaddle.update(dt, isDown, game.height)
  rightPaddle.update(dt, isDown, game.height)

  if (isBallColliding(leftPaddle) || isBallColliding(rightPaddle)) {
    ball.vx *= -1
  }
}
# Game states
Game state logic can get quite complicated, but for a game as simple as this one, it doesn't need to be too involved. We're going to:
- Create a variable called
gameState. - Use that variable to determine what we draw on the screen.
- Update that variable in our code when appropriate to change the game state.
Add the following to index.js:
let gameState = 'start'
In a more complicated game, we could end up with many different states. For now, we're going to stick to 'start', 'play' and 'end'.
The Draw function for each of these screens can get quite long. In some cases, it might make more sense to move these screen draw functions into new modules. For the sake of clarity, we'll keep them in index.js. All we need to do is check the gameState variable inside of our draw function, draw our 'title' screen if the state is play, draw the 'game over' screen if it is end and draw the actual game screen if it is play.
Add the following to the top of your game.draw function.
  if (gameState === 'start') {
    game.context.fillStyle = "#001029"
    game.context.fillRect(0,0,game.width, game.height)
    game.context.fillStyle = "#eae2b7"
    game.context.font = "48px serif"
    let textWidth = game.context.measureText('PONG').width
    game.context.fillText("PONG", game.width/2 - textWidth/2, 100)

    game.context.font = "28px serif"
    const subtitle = 'press any key'
    textWidth = game.context.measureText(subtitle).width
    game.context.fillText(subtitle, game.width/2 - textWidth/2, 300)

    // return is significant here. We don't want to draw anything else
    // if we're in the 'start' state
    return
  }

  if (gameState === 'end') {
    game.context.fillStyle = "#001029"
    game.context.fillRect(0,0,game.width, game.height)
    game.context.fillStyle = "#eae2b7"
    game.context.font = "48px serif"
    let textWidth = game.context.measureText('GAME OVER').width
    game.context.fillText("GAME OVER", game.width/2 - textWidth/2, 100)

    game.context.font = "28px serif"
    const subtitle = 'press any key'
    textWidth = game.context.measureText(subtitle).width
    game.context.fillText(subtitle, game.width/2 - textWidth/2, 300)

    // return is significant here. We don't want to draw anything else
    // if we're in the 'end' state
    return
  }
Notice we're doing that measureText calculation multiple times to center our text. It might be a good idea to move that out to a new function.
We also need to add a statement to the top of our update function to make sure the game isn't running in the background while we're not on the play screen.
game.update = function(dt) {
  if(gameState === "start" || gameState === "end") {
    return
  }
  ...
}
Add the following code to the handleKeydown function, so that our "start" and "end" states transition when pressing any key:
function handleKeydown(event) {
  const key = event.key
  // ADD THIS
  if (gameState === "start") {
    // reset the score for a new game!
    score.player1 = 0
    score.player2 = 0
    gameState = "play"
  }
  // AND THIS
  if (gameState === "end") {
    gameState = "start"
  }

  if (key == 'ArrowUp') {
    isDown.ArrowUp = true
  }
  if (key == 'ArrowDown') {
    isDown.ArrowDown = true
  }
}
Finally, add a check inside of game.update to end the game when one player gets 5 points
game.update = funtion(dt) {
  if (score.player1 == 5 || score.player2 == 5) {
    gameState = "end"
  }
}
# Conclusion
That's it! The game is in a state that we could call 'complete'. Of course, NO game is ever actually finished, is it?
The code for our completed project can be found in this repo.
You can play that example HERE.
# What next?
There are several improvements you could make to this game. Consider the following:
- Display the winner on the 'end' screen.
- Make it work for two players or one player vs. computer.
- Make the ball speed up as the game progresses.
- Add 'powerups' like extra balls, or an extra-long paddle.
- Add a 'paused' state.
- Use pretty images instead of basic shapes.